Installing an SSD in your laptop can be a great way to upgrade your system with a high storage capacity without spending a lot of money. Additionally, you can significantly reduce your wait time when using your laptop and get faster boot times.
This article will provide an introduction on how to install an SSD into your laptop with step-by-step instructions. We will cover everything, from what tools you need to the software involved in the installation process.
What You Will Need
When installing a new SSD into your laptop, you need to make sure you have all the tools and components necessary for the installation. Make sure you have the following items:
- A compatible SSD drive
- A power supply, either from your laptop’s manufacturer or a universal one
- A screwdriver
Additionally, it’s recommended that you have a can of compressed air and cotton swabs on hand, in case there is dust or dirt in the area when you’re installing the drive.
How to Install an SSD in Your Laptop

SSD stands for Solid State Drive, and they are great for both increasing your laptop speed as well as storage capacity. Installing an SSD in your laptop is not too difficult, and you can do it in a few simple steps.
Before you begin, you need to first purchase your SSD. You need to make sure that it will be compatible with your laptop and be sure to get the right storage capacity that you need. You will also need to get a USB enclosure, a Phillips-head screwdriver, a Torx screwdriver, and an antistatic wrist strap.
Steps for Installing an SSD
- Turn off your laptop and detach the power cord.
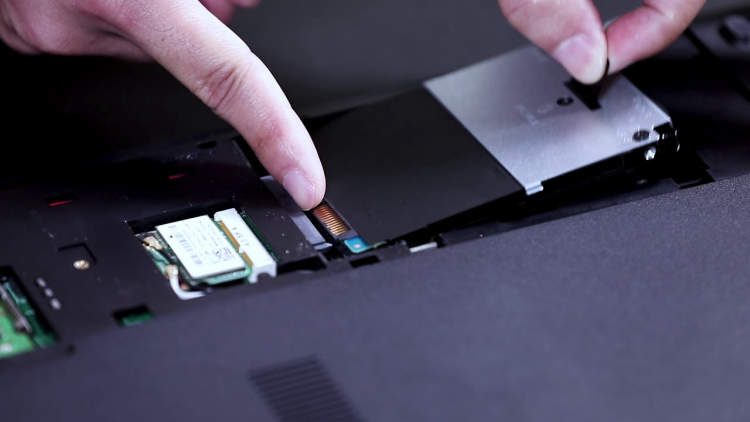
- Remove the laptop’s battery and then unscrew the access panel.
- Install the antistatic wrist strap and then insert the new SSD.
- Secure the SSD with the screws and then replace the access panel.
- Install the SSD into the USB enclosure.
- Connect the USB enclosure to your laptop and turn it on.
- Using your computer’s BIOS, change the boot drive to the SSD.
- Format the SSD and then install the operating system.
- Once the operating system is installed, update the drivers and reinstall software programs.
That’s all you need to do to install a SSD in your laptop. You can also use this same steps if you want to upgrade your laptop using an SSD. Be sure to backup all your important data before you start the installation process.
When you’re done, you should have a much faster laptop with more storage capacity. Installing a SSD is an easy and effective way to bring new life to an old laptop.
Troubleshooting SSD Installation
There are many benefits to installing an SSD in your laptop, but occasionally you may encounter difficulties during the installation. If you find that you are having trouble with your installation, these troubleshooting tips will help you overcome any obstacles.
Check Compatibility
Before you perform the installation, use the manufacturer’s specifications to ensure that your SSD is compatible with your laptop and that you are using the correct mounting kit.
Check Connectors
Be sure that you have the right type of connectors that will accommodate the SSD, such as SATA, M.2, or PCIe. Any wrong type of connector will not fit and lead to poor performance.
Test Manufacturer Checks
Many SSDs come with built-in tests that can be used to test the device. These tests can tell you if the installation was successful, if the device is functioning properly, and if the device is safe to use.
Check BIOS
Once the installation is complete, you should check the settings in your laptop’s BIOS. Make sure that the SSD is being recognized by the BIOS, and that all the settings are correctly configured.
Check Cables
Check all of the cables and connectors that are connected to the SSD. Make sure they are firmly attached and that none of them are damaged. If there is any sign of damage, replace the cables or connectors.
Update Firmware
If the installation is not successful, try updating the firmware on the SSD. This can help resolve any potential compatibility issues.
Monitor Performance
Once you have completed the installation, you should monitor the performance of the SSD. You should be able to easily observe the performance of the SSD and determine if any adjustments are necessary.