Replacing a laptop battery can be an intimidating task. After all, laptops are expensive and delicate pieces of equipment. But don’t worry! Replacing your laptop battery isn’t difficult, and you don’t need any special tools or expertise. With the simple step-by-step guide below, you will be able to replace your laptop battery in no time.
Before you start, you need to make sure that you have the correct replacement laptop battery. If you have the wrong battery, you may damage your laptop. So take your time, review your laptop model, and find the right battery before you proceed.
Preparing to Replace the Laptop Battery
With today’s advancements in technology, laptops are becoming increasingly portable and light-weight. To achieve the utmost portability, laptop creators are leaning toward making parts as small and modular as possible. This leads to the eventual need to maintain or replace components when the laptop’s performance, such as battery health, begins to diminish. Replacing your laptop battery can be a daunting task – so to make your life a little bit easier, here is a guide to preparing for a laptop battery replacement.
Tools and Supplies Needed
You don’t need to be an engineer to know how to replace a laptop battery – but having a few essential tools and supplies will make the job a lot easier. Here is a rundown of what you’ll need:
- Philips-head (or flat head) screwdriver
- Small plastic pry tool
- Replacement laptop battery
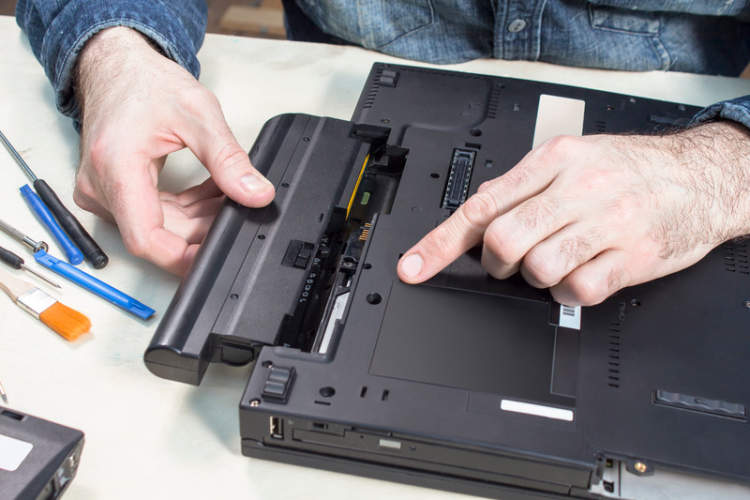
Remove the Old Battery
Once you have your tools and supplies ready, it’s time to begin. First, shut down the laptop and unplug the power cable. To gain access to the battery, you will need to unscrew and remove any cover that houses the battery. This can be done with the screwdriver. Once you’ve removed the covers, locate the battery and disconnect it from the motherboard. This usually requires a small plastic pry tool, since the terminals are connected to a small latch. Disconnect the latch, remove the battery, and set it aside.
Taking Out the Old Laptop Battery

Replacing the battery of your laptop should not take longer than an hour if done properly. It’s easy to do and can be done without help from an expert if the user has patience and attention to detail. Before starting, make sure you have the exact same laptop battery as your original, or the new one might not work.
To take out the old laptop battery, here are the steps you should take:
- Shut down your laptop and unplug any cords.
- Locate your laptop’s battery compartment, it should be on the bottom or side. If it’s a removable battery, remove it from the laptop.
- If it’s a built-in battery, use a screwdriver to remove the screws and remove the back panel of the laptop.
- If you have a removable battery, you can slide it out of the laptop and you’re done.
- If your battery is built-in, you should see a metal bracket that is holding it in place. Unscrew it and remove the battery.
- Once the battery is out, check to make sure no screws or parts are still attached.
Once you have taken out the old laptop battery, you may now move on to replacing it with the new battery. Make sure to properly read the instructions of your new battery so you can fit it properly in the laptop.
Installing the New Laptop Battery
When the battery in your laptop is no longer holding its charge it’s likely time to replace it with a new one. Fortunately, replacing a laptop battery is a relatively simple task that only requires a few steps.
Preparation
Before beginning the process of swapping out the laptop battery, you will need to take a few precautions and gather the right materials. Make sure your laptop is powered off and unplugged from power sources, and remove the battery if necessary. Afterward, you can begin to gather the necessary equipment.
- New laptop battery
- Screwdriver
- Safety glasses
Replacing the Battery
Assuming you have gathered all the necessary equipment, you can begin to replace the laptop battery. First, make sure to wear safety glasses when accessing electronic components. Most laptop batteries are stored underneath special covers and require a small screwdriver to open. Once you have access, remove the old laptop battery by disconnecting it from socket and then remove it from the laptop. If the new battery has tags, be sure to remove them before installation.
After the battery has been removed, you can now install the new laptop battery. To replace the battery, line up the connection points on the battery and the laptop, and connect them. Once both connections are secure, you can close up the laptop and replace all screws you have removed.
Testing the New Battery
As a final step to replace the battery, you should now power on the laptop and see how the new battery functions. If the laptop is able to power on and hold the charge from the new battery, the process has been completed. However, if the laptop does not hold any charge, it’s likely the battery is faulty and should be replaced.
Conclusion
Replacing a laptop battery is a simple process that anyone can do with the right tools. It’s highly recommended that you use OEM parts to ensure a good fit and optimal performance. There are a few key steps to follow when you are replacing a battery, including first removing old the battery from the laptop and disposing of it properly, then installing a new battery according to the manufacturer’s instructions.
With the correct preparation and materials, replacing a laptop battery can be done quickly and with ease. There are some risks involved, so be sure to take the necessary precautions and work in a well-ventilated space. Doing so will ensure your safety and the best possible results.